Support articles for EarMaster Cloud Students
- Connect to the Cloud
- Training modes
- Using the exercises
- Results and stats
Connect to the Cloud
How to proceed
Your EarMaster Cloud login credentials were sent to you by email when your user account was created by the admin of your school. You will need these credentials to connect EarMaster to the cloud on your Windows PC, Mac, Chromebook, iPad, iPhone or Android device.
Your EarMaster Cloud credentials consist of:
- The school ID of your school*
- Your user name
- Your password
* If you are paying for your own access via a personal subscription, leave this field empty
 Phone, tablet and Chromebook (students only)
- Download the free EarMaster App from the App Store (iOS) or the Google Play Store (Android or Chromebook)
- Tap the cloud-shaped icon at the top left of the screen, type your EarMaster Cloud user credentials and tap "Log in".
Windows PC and Mac (students and teachers)
- Download EarMaster for PC or Mac using the download link located in the email you received from EarMaster Cloud.
- Tap the cloud-shaped icon at the top left of the screen, type your EarMaster Cloud user credentials and tap "Log in".
If you are a Teacher, you will have access to 2 tabs at the bottom of the screen:
- A Teacher view that gives you access to EarMaster's 4 teaching tools: Student Results, Assignment Manager, Workbook Editor, and Music Library.
- A Normal view which shows you the standard home screen of EarMaster, as seen by your students.
Lost your credentials?
Don't worry. Go to this page and type the email address that was used to create your EarMaster Cloud user account. You will then receive an email with new credentials.
No internet access?
No problem. You can use the app offline for up to 7 days. All your results and progress will be saved locally and uploaded the next time you start EarMaster while connected to the internet.
Training Modes
The first thing you see when you start EarMaster is a list of training modes. Those training modes can be built-in courses provided by EarMaster or assignments sent by your teachers.
You will also find a Customized Exercise training mode at the bottom of the list. This is your private playground in the software where you can configure your own exercises without being monitored by your teacher. All results obtained in the Customized Exercise mode are not synced with the cloud and are therefore only visible to you.

As you complete the exercises, your teacher will automatically receive your results. By default, only your best score at each lesson will be shown to your teacher, but he or she will also be able to obtain a detailed view of all your attempts.
Class Assignments
In the screenshot above, clicking on FM 2 Assignments will let me use the assignments sent by my teacher to the class called FM 2, in which I am enrolled.
If my teacher sends a new assignment to my class, I will see a flag icon to the right of FM 2 Assignments in the home screen of EarMaster. It will tell me that a new assignment has arrived and is ready to use.

Personal Assignments
In the Personal Assignments section, you will find assignments that your teacher has assigned to you personally. These can be supplementary exercises, extra homework, etc. They work the same way as the class assignments described above.
Built-In Content
As an EarMaster Cloud student, you get access to all the content of the full version of EarMaster:
- Beginner's Course - complete course to learn of revise the fundamentals of music theory and ear training.
- General Workshops - 14 workshops to perfect most of your listening and sight-singing skills.
- Jazz Workshops - 9 workshops to dive into the specifics of Jazz ear training, sight-singing and rhythm study.
- RCM Voice - Levels 1 to 6 - A compete course to get prepared for the Royal Conservatory of Music's vocal exams at levels 1 to 6.
- Customized Exercise - Take full control over your training sessions by configuring your own exercises (not synced with the cloud).
Using the exercises
Lesson introductions
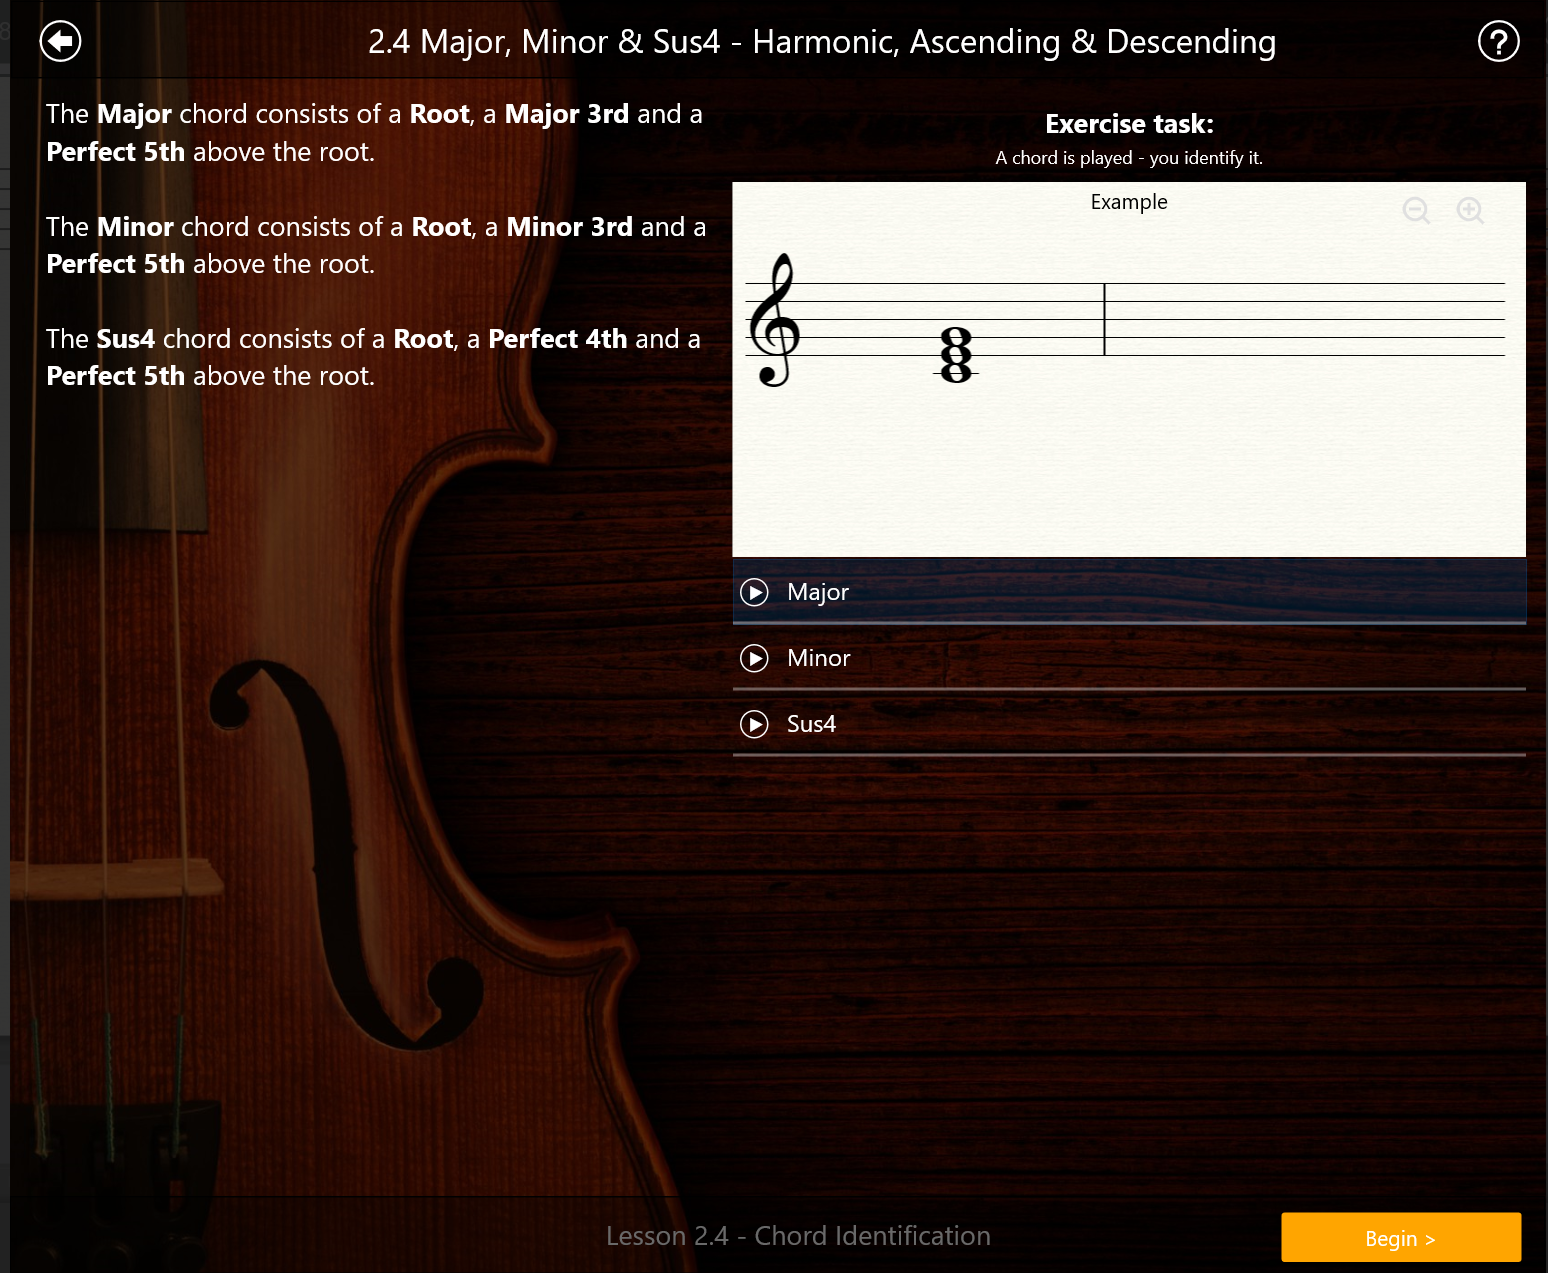
The first thing you will see when you launch a lesson is the Lesson Introduction. It consists of 2 sections: on the left you will see a description of the lesson, and on the right you will find audio/visual examples of the items that you will meet in the exercise.

Once you are ready to start the exercise, click "Begin".
Understanding the Exercise Interface
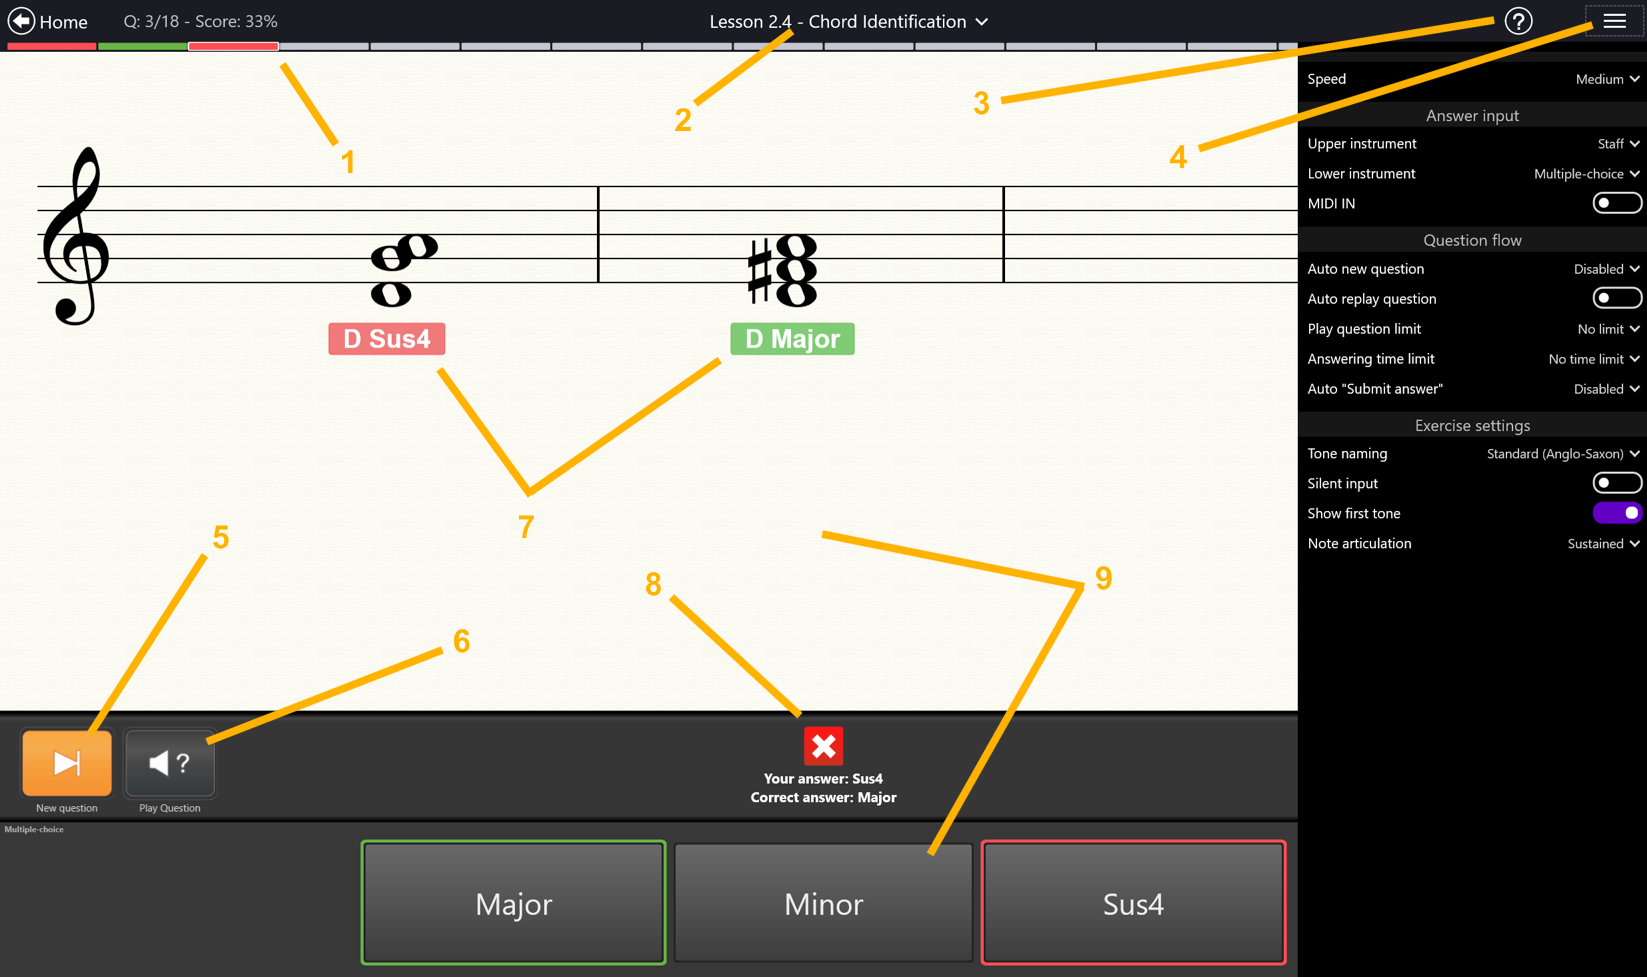
Even though each activity type will show different elements, all of them share a common structure and design:

- Progression: How far you are in this exercise. Grey = next questions. Blue = active question. Green = Successfully answered. Red = answered incorrectly. Dark grey = supplemental questions activated if you haven't reached the minimum score at the end of the exercise.
- Lesson number and activity: The lesson number, composed of a module number and a lesson number (in this screenshot: module 2, lesson 4).
- Smart help: click on this anywhere in the app to activate hotspots on the screen. Hovering with the mouse or tapping a hotspot will display helpful explanation about the item in focus.
- Exercise Options: Click here to open a set of options for the current exercise (tone-naming system, on-screen interfaces, tempo, enable MIDI In or Microphone, etc.
- New question: Press this button to obtain a new question.
- Play question: Press this button to hear the Question again.
- Evaluation on the staff: Shows the correct answer (green label) next to a wrong answer (red label) after the user submitted his answer. Had the answer submitted by the user been correct, only the correct answer (green label) would have been diplayed. Depending on the exercise type, you may also meet arrows to indicate whether your pitch was flat or sharp, or whether your timing was early or late. The color coding (green = correct, red = incorrect) is used everywhere in the app.
- Communication panel: at this spot, you will find instructions on what to do at any moment given, or feedback about your answer once you have submitted it. If you are not sure what to do in an exercise, look here.
- Answering interfaces: EarMaster offers 2 answering interfaces. An upper interface and a lower interface. Those can be configured to show multiple tools: a notation staff, note names, a piano keyboard, a guitar, a violin, a cello, solfege syllables, scale degrees, etc. You can choose what to show in the Exercise Options (4).
Results and Stats
As you complete the exercises of EarMaster, your results will be stored in the software's Results and Statistics.
You can view them by clicking on this icon in the home screen of EarMaster:

Structure of the results
In EarMaster, a MODULE is a container for a set of lessons. In the screenshot below, Module 4 consists of 4 lessons: 4.1, 4.2, 4.3 and 4.4.
The score column of each module (e.g. 92% for Module 4) is the average of the best scores of each lesson of that module.
The score for each lesson is the score of the best completed attempt (e.g. 100% for lesson 4.2). By clicking on the arrow next to the tile of a lesson, you can see all attempts for that lesson. The best one is highlighted with an orange "thumbs up" icon.

